How to use RapidAPI with search parameters in Next.js in a safer way
A beginner-oriented guide for those who want to use APIs with search parameters safer with Next.js


🔓 What you'll get from this 12-minute read
You'll sharpen your skills with the RapidAPI service and its vast offer of APIs with Axios.
You'll get to know the server-side part of Next.js as a preparation for safer API key usage.
You'll improve your general API, React and Next.js understanding.
📝 Prerequisites
For this tutorial, I am using Next.js which describes itself as a framework for React. Since I am actually making use of the server-side part of Next.js, I recommend reading this tutorial only if you have heard of Next.js in the past. If you have never seen Next.js before, I would suggest going through a quick introduction of what Next.js actually is.
I am using TypeScript, which can be described as a syntactical superset of JavaScript. Due to that, you are able to add types to your code, which can help with regards to error safety during the development phase, for example. However, for this tutorial, you are also able to follow without any TypeScript knowledge since I am not diving deep into the TypeScript part. There are some little differences, but I will show you the respective JavaScript approaches for these parts.
You should have some basic understanding of Axios. Even though I will explain my examples, it would be helpful if you saw an Axios API call combined with the
tryandcatchsyntax before.
🎯 The Objective
As I started my journey to learn more about APIs and their usage, I found multiple general written tutorials which helped me in order to achieve some sort of basic API understanding.
However, I craved more specific API examples for two reason:
I was still struggling with APIs that required search parameters as an input and needed additional exemplified information to this topic.
I didn't know how to secure my API keys, which should be kept secret as you deploy your projects on Vercel, for example.
Due to these problems, I want to share an exemplified approach of how to use an API from RapidAPI's service with search parameters while using Next.js as the underlying React framework.
Please keep in mind that the following isn't necessarily the best approach ever. However, it's one way that works and can help build a deeper understanding when using Next.js with APIs in general.
🚴 RapidAPI
RapidAPI is a hub for a lot of different APIs that developers can use. While there are some APIs which charge money for their usage, there are also a lot of APIs which are free to use with some sort of limit - due to this fact, RapidAPI is great for practical learning projects in my opinion.
As a first step, we want to find a suitable API, which we are going to use for our Next.js API example. Since I am a fan of good music, I found the Lyrics Plus API. This API can be mainly used to - probably not that surprising - find lyrics of songs. This service is declared as Freemium, so you can use it for free to some extent (200 requests per month are free).
In this documentation for the Lyrics Plus API (see the link above), you are able to find different information:
On the left hand side, you find the API endpoints which you can choose in order to get the respective information you are searching for. For my example, I am using Get artist's song lyric, which includes a
GETmethod.In the middle, you can see your personal account on the top with a bunch of details below that, which can be quite confusing if you haven't worked that much with APIs and RapidAPI before.
For this part, however, you just have to understand that you have a personal key (X-RapidAPI-Key) which should be kept secret. The X-RapidAPI-Host is the first-level-domain for this specific API.
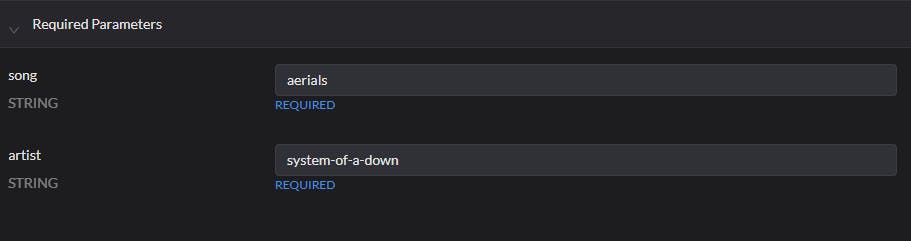
In this section, you will also find the required parameters, which are song and artist:
- On the right side you find an example Code Snippet of how you could use this API for the respective case - I am using the Node.js -> Axios Code snippet. Here you can see that for the url some of the information that we saw in the middle section is used - the X-RapidAPI-Host, your X-RapidAPI-Key, the
songparameter as well as theartistparameter.
After clicking on Test Endpoint, you will also be able to see an example response for this specific API call.
✨ Making use of Next.js
Now that we have chosen which API we want to use, the next step is to dive into Next.js in order to build the required API logic. For this part, I won't explain how to initialize a new Next.js project.
Please refer to the official Next.js documentation in order to learn more about initializing your first Next.js application.
❓ Why Next.js?
One of the many advantages of Next.js is the fact that this framework enables an easy server-side connection, which we can also use for our API. This is a safer approach for our RapidAPI key that should be kept secret.
Following this, we will establish a server-side approach which will act as an endpoint in Next.js which we can then call on our client-side in order to get our API response.
Everything that's done on the server-side doesn't get to the client-side. This is why we can use our API key (or other secret information) on the server-side for an overall safer approach; this can't be done directly with just React.
🔧 Setting up the server-side
If you have not worked much with Next.js before, just have this quick information in mind as we approach:
While the React library itself - which you are probably familiar with - just has a client-side on its own, the Next.js framework actually provides a client-side AND a server-side which can interact with each other. Therefore, we will work on both the client-side and server-side.
To start off, we want to create a new file in the project folder in pages/api. You can name this whatever you like - I am going for lyricsHandler.ts (have in mind that you can do that with JavaScript (lyricsHandler.js) as well instead of TypeScript).
At our new lyricsHandler.ts file in pages/api, we want to start to import the needed requirements. For the TypeScript approach, we will import Axios as well specific TypeScript types:
import axios from "axios";
import type { NextApiRequest, NextApiResponse } from "next";
❗ If you are using JavaScript, ignore the import of these two types.
As a next step, I am going to create a handler which checks the API method it receives from the client-side:
export default async function handler(req: NextApiRequest, res: NextApiResponse) {
    if (req.method === 'POST') {
        return await lyricsServerSideAPICall(req, res);
    }
    else {
        return res.status(500).json({ message: 'This method is not available.', success: false })
    }
}
If you're using JavaScript, just use req and res as function parameters without the NextApiRequest and NextApiResponse types.
What's happening here is that this function only accepts the POST method - maybe you remember that most standard APIs have some sort of GET or POST method.
After this check, another function gets returned that we will define in a second. If the request to this server-side endpoint is not a POST method, we will return an error message instead.
❗ Wait, why are we using a POST method instead of a GET method?
Bear with me for some more seconds to understand this concept.
The TL;DR-answer to this would be:
While the actual API call on the server-side uses a GET method, the client-side call uses a POST method to allow for easier handling of input parameters - in this case, the song and artist search parameters.
After establishing this asynchronous handler function, we want to create the lyricsServerSideAPICall function that you already saw above. The name doesn't matter. You can name it whatever you want.
async function lyricsServerSideAPICall(req: NextApiRequest, res: NextApiResponse) {
    const body = req.body;
    try {
        const responseData = await axios({
            method: 'GET',
            url: `https://lyrics-plus.p.rapidapi.com/lyrics/${body.song}/${body.artist}`,
            headers: {
                'X-RapidAPI-Key': `${process.env.SECRET_KEY}`,
                'X-RapidAPI-Host': 'lyrics-plus.p.rapidapi.com'
              }
        })
        return res.status(200).json(responseData.data)
    }
    catch (error) {
        return res.status(500).json({ error: 'There is an error at the server-side API call', success: false })
    }
}
❗ If you are using JavaScript, you can again ignore these two types of NextApiRequest and NextApiResponse.
First, we introduce a variable called body that has a value of req.body. This way, we are able to make use of the input that we will inject on the client-side when calling our API.
For this case, you can imagine that our body variable will be an object with the song and artist input.
After that, I am using the try and catch approach, combined with Axios. If you remember back to what you saw in the API documentation on RapidAPI, you will notice that this Axios information seems oddly familiar.
However, there are some differences. Since we are aiming to actually give specific search parameters to our API call, you can see that we changed the url with the help of a Template Literal. This way, we are able to put in the body object which, as mentioned before, will have the respective song and artist values.
Besides that, you can see that I'm using process.env.SECRET_KEY as my personal RapidAPI key. This is an environment variable. You don't have to follow this approach to make it work. You are able to directly put in your API key.
After these steps, I am returning my final API result or catching the error if one occurs.
🔥 Did you know?
With this server-side approach, it's actually pretty convenient to include such environmental variables in Netlify or Vercel as mentioned above. It can help make your API processes relatively safe - combined with the server-side approach we are using.
Thus, the processes that are computed on the server-side don't reach the client-side. Therefore, this whole server-side thinking in Next.js is also quite convenient for including and working with databases, for example.
This safety aspect can be discussed way more in detail, but especially as a beginner who mainly wants to work with APIs on the front-end, this way is a neat middle ground.
🔧 Setting up the client-side
As explained before, I am using a combination of server-side and client-side in order to make my actual API call. After creating the server-side part, we are going to look at our client-side where we will fetch data from our server-side which we just defined.
You don't have to create a specific new file, but you can if you want to. For my example, I am using the index.tsx file, which can be found in pages.
Firstly, we want to import useEffect and useState since we will use both hooks.
import { useEffect, useState } from 'react';
Next, we want to initialize the values we are going to use for our search parameters (song and artist). In addition, I'm also using a state for the final API response. As I'm using TypeScript, I made use of an interface for this case in order to declare the types which will appear in the API response.
interface apiTest {
  name: string
  lyrics: string
}
 const [song, setSong] = useState("aerials");
 const [artist, setArtist] = useState("system-of-a-down");
 const [APIResponse, setAPIResponse] = useState({} as apiTest);
❗ If you are using JavaScript, you can ignore the interface on top as well as <string> and the {} as apiTest.
The next and last step is going to be the actual API call. For this one, you could - for example - use useEffect in order to call the API:
  useEffect(() => {
    async function APIFunction() {
      const body = { song: song, artist: artist };
      try {
        const response = await fetch("/api/lyricsHandler", {
          method: 'POST',
          headers: {"Content-Type": "application/json"},
          body: JSON.stringify(body)
        });
        setAPIResponse(await response.json());
      }
      catch (error) {
        console.error({ error: "something went wrong with the API on the client-side" })
      }
    }
    APIFunction();
  }, [])
As you can see above, I'm performing an API call with the try and await syntax. Before actually starting to fetch the data, we need a body variable that we can assign the search parameters to - in this case, song and artist.
Please keep in mind that you can initialize the body variable as you can see above or like this: const body = { song, artist }. Both approaches do work since the key and corresponding value are named the same for song and artist in this object.
Now that we have this set up, we can actually start the fetching process. You can see that we are reaching out to the /api/lyricsHandler endpoint, which works due to the fact that we created our server-side file in the api folder of Next.js.
Files which are created in this api folder can be reached out through this endpoint mechanism - how comfortable is that!
Followed by the method we see that I'm using POST even though we wanted to perform a GET call initially. That's because we are not reaching out to the actual API just now. Instead, we are talking with the server-side in Next.js that requires this POST method in order to accept parameters which we can send to the server-side (in this case, our body variable with song and artist).
In order to receive the data which eventually reaches us, I'm using the APIResponse state. After finishing this whole asynchronous function, we are pretty much good to go!
To display it on my screen, I simply use {APIResponse && APIResponse?.lyrics} to get the following results for song: 'aerials' and artist: 'system-of-a-down':

✅ Conclusion
In the end, we created a connection to the server-side in order to compute our API call while receiving the result on the client-side to successfully display it. With this approach, we are relatively safe to use API keys as environment variables on the server side of Next.js.
📃 Resources
- General information from the Next.js documentation